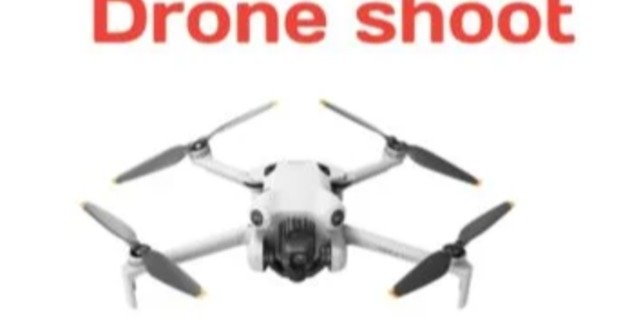
Creating professional drone footage traditionally required an expensive drone, a skilled pilot, suitable weather conditions, and a location where drone flights were permitted. AI video generation has changed this process. Today, you can transform a single photograph into a cinematic drone-style video by using image-to-video technology.
AI video generators can analyze a still image and create simulated camera movement. The camera can appear to rise into the sky, move backward, orbit around a subject, or fly through a landscape. Recent AI video tools specifically support drone-style effects that pull the camera upward and away from the original subject. (Kapwing)
This technique is useful for content creators, photographers, travel bloggers, real estate marketers, social media creators, and anyone who wants aerial-looking footage without recording an actual drone flight.
What Is an AI Drone Shoot?
An AI drone shoot is a video created from a still image using artificial intelligence. Instead of recording a real aerial video, you provide the AI with a photograph and describe the camera movement you want.
The AI analyzes the composition of the image and generates additional frames that create the appearance of movement.
For example, you can upload a photo of:
A person standing outdoors.
A house or building.
A mountain landscape.
A road.
A village.
A lake.
A car.
A wedding location.
A tourist destination.
You can then instruct the AI to create a smooth drone shot that starts with the original image and gradually moves upward or backward.
Image-to-video technology uses the uploaded photograph as the visual starting point and generates movement from that frame. (ZSky AI)
How Does AI Turn One Picture Into a Drone Video?
The process is based on image-to-video generation.
First, the AI analyzes the uploaded image. It identifies subjects, objects, background elements, lighting, perspective, and depth.
Next, it interprets your text prompt.
If your prompt says, “Create a cinematic drone shot that slowly rises and moves backward,” the AI attempts to simulate that camera movement.
It then generates multiple frames that connect the original image with the new camera position.
The result is a short video that gives the impression that a drone has moved through the scene.
The AI does not physically fly a drone. It creates a synthetic video based on the information contained in your image and instructions.
Why Are AI Drone Videos Becoming Popular?
Drone footage has a strong visual impact because it provides a wide perspective.
A normal photograph can show a person, building, or landscape from one position. A drone-style video can create a sense of movement and reveal more of the surrounding environment.
AI makes this effect easier to create.
You do not need to own a drone.
You do not need a drone pilot.
You do not need to carry additional equipment.
You can start with one suitable photograph.
You can also create several versions of the same scene with different camera movements.
Recent AI tools offer dedicated drone effects, including aerial pull-ups and pullbacks from a single image. (Artta AI)
What You Need Before Creating an AI Drone Shoot
You only need a few things.
A good quality photograph.
An AI image-to-video generator.
A suitable drone movement prompt.
A stable internet connection.
A little time for experimentation.
The quality of the original image matters significantly. A clear, high-resolution photograph gives the AI more visual information to work with.
Outdoor photographs can work particularly well for aerial reveal effects because they contain visible environmental depth.
A wide scene can also give the AI more room to simulate camera movement.
Step 1, Choose the Right Picture
The first step is selecting a suitable photograph.
Your image should be clear and reasonably high resolution. Avoid heavily blurred images, extremely dark photographs, or images with too much compression.
For a drone pullback effect, choose an image where the main subject is surrounded by visible environment.
For example, a person standing in an open field can work better than a person standing directly against a wall.
Similarly, a house surrounded by trees and roads gives the AI more environmental information than a tightly cropped picture of the front door.
Step 2, Upload Your Image
Open your preferred AI video generation platform and locate its image-to-video feature.
Upload your photograph as the starting frame.
Some tools support common formats such as JPG and PNG. Certain dedicated drone effect tools also specify file-size limits, so check the requirements before uploading. (Artta AI)
After uploading the image, select the video generation option.
Some platforms provide a dedicated Drone Shot effect. Others require you to describe the drone movement through a text prompt.
Step 3, Write a Clear Drone Prompt
Your prompt tells the AI what should happen.
A simple prompt can work:
“Create a cinematic drone shot from this image. The camera slowly rises upward and moves backward, revealing more of the surrounding landscape. Keep the main subject stable and preserve the original environment. Smooth realistic camera movement, natural lighting, photorealistic result.”
You can modify the prompt according to your image.
The more clearly you describe the camera movement, the easier it is for the AI to understand your intention.
Step 4, Describe the Camera Movement
Camera movement is one of the most important parts of an AI drone video.
You can request different movements.
Drone Pullback
The camera gradually moves backward while increasing the visible area around the subject.
This is one of the easiest drone effects to create.
Drone Rise
The camera moves upward as if a drone is ascending.
This can reveal rooftops, roads, mountains, fields, or surrounding buildings.
Pull Up and Away
The camera moves upward and backward at the same time.
This creates a classic cinematic aerial reveal.
Orbit Shot
The camera appears to move around the subject while maintaining focus on it.
This can work well with buildings, vehicles, people, and landmarks.
FPV Flythrough
The camera moves forward through the environment, creating the feeling of flying through the scene.
This effect can be more difficult because the AI has to generate additional environmental details.
Step 5, Keep the Subject Stable
If your image contains a person, car, building, or other important subject, tell the AI to preserve it.
For example:
“Keep the person unchanged and maintain natural proportions throughout the video.”
This can reduce unwanted transformations.
AI video models can sometimes modify faces, clothing, objects, or architectural details as the camera moves.
A clear prompt can help maintain consistency.
Step 6, Generate the First Version
After entering the prompt, generate the video.
Do not expect the first generation to be perfect every time.
AI video generation is probabilistic. The same image and prompt can sometimes produce different results.
Check the output carefully.
Look at the camera movement.
Check the subject.
Check the background.
Look for unwanted objects.
Check whether the scene remains consistent.
A recent tutorial on AI drone shots recommends evaluating whether the generated camera follows the intended path, maintains the subject correctly, preserves important details, and produces a believable altitude. (Kapwing)
Step 7, Improve the Result
If the first result does not look right, simplify your instructions.
Instead of giving the AI a complicated sequence, start with one movement.
For example:
“Slowly rise upward and move backward while keeping the house centered.”
This is easier to interpret than a long prompt containing multiple movements.
You can generate another version and gradually adjust the prompt.
Using Flight Path Instructions
Advanced AI workflows can use visual guides to describe the desired drone movement.
For example, you can draw a line over a copy of your photograph to indicate the intended flight path.
Arrows can indicate the direction in which the camera should look.
This gives the AI both visual and written instructions.
A recent workflow demonstrates this approach by drawing a flight path and camera direction on an image before generating the final video. It also recommends keeping the guides out of the final source image so that they do not appear in the generated video. (Kapwing)
This technique can provide more control when a simple text prompt does not produce the desired movement.
Best AI Drone Prompt
You can use the following prompt for a cinematic result:
“Use the uploaded image as the exact starting frame. Create a smooth cinematic drone shot. The camera slowly rises upward and moves backward, gradually revealing the surrounding environment. Keep the main subject centered and preserve its appearance, proportions, colors, and details. Maintain realistic lighting and natural depth. Create smooth professional aerial camera movement with no sudden changes, distortion, cuts, text, or artificial objects. Keep the scene photorealistic and visually consistent throughout the video.”
Prompt for a Person
If your picture contains a person, try:
“Create a cinematic aerial drone shot from the uploaded photograph. Start with the original composition and slowly move the camera upward and backward. Keep the person completely consistent with the original image. Preserve the face, clothing, body proportions, and position. Reveal the surrounding landscape naturally. Smooth camera movement, realistic lighting, cinematic depth, photorealistic quality.”
Prompt for a House
For real estate content, use:
“Create a professional cinematic drone shot from this image of the house. Start close to the original frame and slowly rise and move backward, revealing the complete property and surrounding environment. Keep the architecture accurate and stable. Preserve the building’s shape, windows, roof, colors, trees, and surrounding structures. Smooth realistic aerial movement, natural daylight, photorealistic video.”
Prompt for a Landscape
For mountains, lakes, forests, and scenic locations:
“Transform this photograph into a cinematic aerial drone video. Slowly rise upward and move backward to reveal more of the landscape. Preserve the original mountains, trees, water, sky, and natural colors. Create realistic depth and smooth camera movement. Use natural atmospheric perspective and cinematic lighting. Avoid sudden changes or artificial objects.”
Prompt for a Car
For automotive content:
“Create a cinematic drone reveal from this car photograph. Begin with the original composition and slowly rise upward while moving backward. Keep the car’s design, color, wheels, proportions, and position consistent. Reveal the surrounding road and environment naturally. Smooth professional drone movement, realistic lighting, sharp details, photorealistic video.”
Best Photos for AI Drone Videos
Not every image produces the same result.
A good starting photograph should have clear details.
Wide outdoor scenes are often useful.
Images with visible foreground and background can provide more depth information.
Photos captured at ground level can work particularly well for a pull-up effect. Dedicated drone-effect tools recommend outdoor photographs and scenes with a single subject in a wider environment. (Artta AI)
Avoid extremely crowded scenes when possible.
Too many overlapping objects can make it harder for the AI to maintain consistency.
Common Problems With AI Drone Videos
AI-generated drone videos can sometimes contain visual problems.
The subject may change.
A person’s face may become distorted.
Buildings may change shape.
Trees may appear or disappear.
Cars may develop incorrect details.
The camera may move in an unexpected direction.
The background may become inconsistent.
The AI may create objects that were not present in the original photograph.
These problems occur because the model is generating new frames rather than physically recording the scene.
How to Reduce AI Distortion
Use a high-quality source image.
Keep the main subject clearly visible.
Avoid excessive motion instructions.
Describe one camera movement at a time.
Tell the AI to preserve the original subject.
Avoid extremely complicated flight paths.
Generate several versions and select the best result.
If a path-based workflow is available, use simple visual guides rather than covering the entire image with complicated markings. Recent testing suggests that simpler paths can be easier for AI systems to interpret. (Kapwing)
AI Drone Videos for TikTok
Vertical drone videos are suitable for TikTok and other short-form platforms.
Use a vertical source image when possible.
A 9:16 composition can make it easier to publish the final video without excessive cropping.
Create a slow reveal for scenic content.
Use a faster movement for energetic content.
Add music and captions during the editing stage.
Keep the opening frame visually interesting because viewers decide quickly whether to continue watching.
AI Drone Videos for YouTube Shorts
YouTube Shorts can also benefit from AI aerial effects.
A short drone reveal can introduce:
Travel destinations.
Cars.
Houses.
Events.
Landscapes.
School campuses.
Restaurants.
Hotels.
Tourist locations.
For Shorts, vertical video is usually the most practical format.
AI Drone Videos for Instagram Reels
Instagram Reels can use the same image-to-video workflow.
Start with a strong photograph.
Generate a short aerial movement.
Add suitable background music.
Use a simple caption.
Export in a vertical format.
A single photograph can therefore become the opening visual for a short promotional video.
AI Drone Videos for Real Estate
Real estate professionals can use AI drone-style videos to create aerial-looking property presentations from photographs.
A house photograph can be transformed into a simulated aerial reveal.
The result can help show the surrounding property, road, garden, and environment.
However, AI-generated footage should not be presented as genuine drone footage if it was not actually recorded by a drone.
This distinction is particularly important in professional property marketing.
AI Drone Videos for Travel Content
Travel creators can turn ordinary photographs into short cinematic clips.
A photograph of a mountain can become a slow aerial reveal.
A beach photograph can become a rising camera shot.
A city image can become a simulated flyover.
A historical location can receive a cinematic introduction.
This approach can help creators produce more dynamic content from existing photographs.
AI Drone Videos for School and Event Content
Schools and event organizers can also use this technique.
A photograph of a school building can become a cinematic aerial-style introduction.
A group photograph can be animated with a slow camera movement.
An event venue can receive a simulated aerial reveal.
This can be useful for promotional videos and social media posts when genuine aerial footage is unavailable.
Advantages of AI Drone Video Generation
AI drone video generation has several advantages.
It requires only a photograph.
It does not require physical drone equipment.
It can be used indoors during the editing process.
It can generate several variations.
It can save production time.
It can help creators animate old photographs.
It can create aerial-style content for social media.
It can be useful for marketing and presentations.
Some AI drone tools specifically allow users to upload a single image and generate a drone-style pullback without using a physical drone. (DroneShot)
Limitations of AI Drone Videos
AI drone videos also have limitations.
The result may not perfectly match reality.
Objects can change between frames.
The camera path may not follow the exact instructions.
Faces can become distorted.
Fine architectural details may change.
Complex environments can produce visual errors.
AI-generated video can also require credits or paid access depending on the platform.
Some tools provide fast generation modes and higher-quality modes with different credit requirements. (Artta AI)
AI Drone Shoot vs Real Drone Shoot
A real drone records actual footage.
An AI drone video creates simulated movement from an image.
Real drone footage provides genuine environmental information, real shadows, real reflections, and authentic camera movement.
AI video is faster and easier when you only have a photograph.
The best choice depends on your goal.
For professional surveying, inspection, journalism, or situations where accurate real-world footage matters, genuine drone footage may be necessary.
For creative social media content, promotional visuals, and cinematic experiments, AI can be useful.
Tips for Better Results
Use the highest-quality photograph available.
Choose a scene with clear depth.
Keep the main subject visible.
Use simple camera instructions.
Specify the desired movement.
Tell the AI to preserve the original subject.
Avoid unnecessary visual changes.
Generate multiple versions.
Choose the most realistic output.
Edit the final clip before publishing.
For advanced workflows, you can also provide visual flight-path guidance instead of relying entirely on text. This can help communicate complex camera movement more clearly. (Kapwing)
Frequently Asked Questions
Can I Create a Drone Video From One Picture?
Yes. Image-to-video AI tools can use a single photograph as the starting frame and generate a moving video.
Do I Need a Real Drone?
No. AI-generated drone videos do not require a physical drone.
Can AI Make a Drone Pullback?
Yes. Drone pullback is one of the common AI camera effects available for image-to-video generation.
Can I Use a Person’s Photo?
Yes, provided you have the necessary rights or permission to use the photograph.
Can I Create a Drone Video of a House?
Yes. A clear exterior photograph of a house can work well for a simulated aerial reveal.
What Is the Best Drone Movement?
A slow rise and pullback is a good starting point because it can reveal more of the surrounding environment while keeping the main subject visible.
Why Does My AI Drone Video Look Distorted?
The AI generates new frames based on the source image. Complex movements or insufficient visual information can result in inconsistencies.
How Can I Improve the Result?
Use a clear photograph, describe one movement at a time, preserve the subject, and generate multiple versions.
Can I Use AI Drone Videos on TikTok?
Yes. AI-generated drone-style videos can be edited for short-form platforms such as TikTok, Reels, and YouTube Shorts.
Can AI Create an FPV Drone Effect?
Yes. Some AI video generators specifically support FPV-style movement and aerial flythrough effects from still images. (FlexClip)
Is AI Drone Footage Real?
No. If the video was generated from a photograph, it is simulated AI footage rather than a recording captured by a physical drone.
Final Thoughts
AI drone video generation provides an easy way to transform a single photograph into a dynamic cinematic clip. You can start with a normal picture and use image-to-video AI to simulate a camera rising, pulling backward, orbiting, or flying through a scene.
The quality of your starting image and the clarity of your prompt have a major effect on the result. Start with a clean photograph, choose a simple camera movement, and tell the AI to preserve the important details.
For the best results, experiment with several generations instead of relying on one attempt. If the camera movement is incorrect, simplify your instructions. If the subject changes, strengthen your preservation instructions. For advanced projects, visual flight-path guides can provide additional control.